Welcome back for the second installment of our updated home tour. We’ve been busy saving our pennies and slowly updating each room in the house with new furniture and accessories as our budget and needs allow. Last week I shared a tour of the progress we’ve made in our living and dining rooms. Come on in for another glimpse into the home that we love – this time into our updated kitchen, bathroom, and hallway.
This post contains affiliate links for your shopping convenience. We earn a small commission each time someone makes a purchase through one of our links, which helps to support the blog.
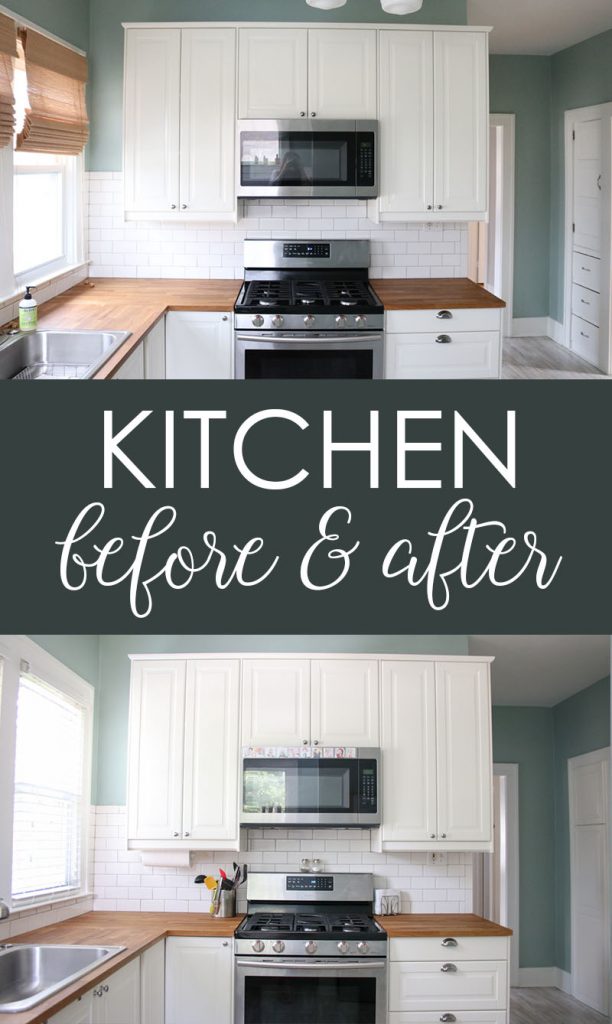
Kitchen: Before
When we first moved in to our 1925 house, the kitchen was one of the best-suited rooms to our needs. The previous homeowners had done a massive kitchen overhaul and they did an outstanding job. I adore the cabinets and countertops (both from IKEA), the paint color, subway tile backsplash … even the floors and schoolhouse light fixture are beautiful. When the kitchen looked this great when we moved in, customizing the space to fit our needs was a breeze!
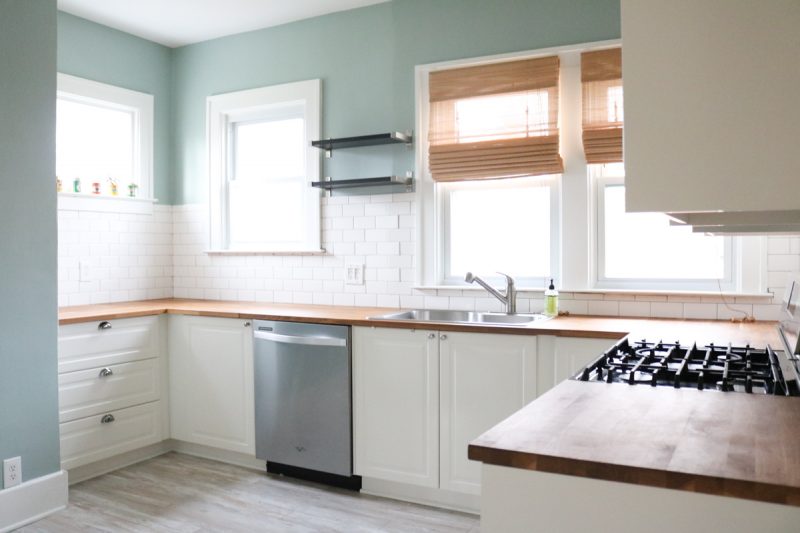

Kitchen: Today
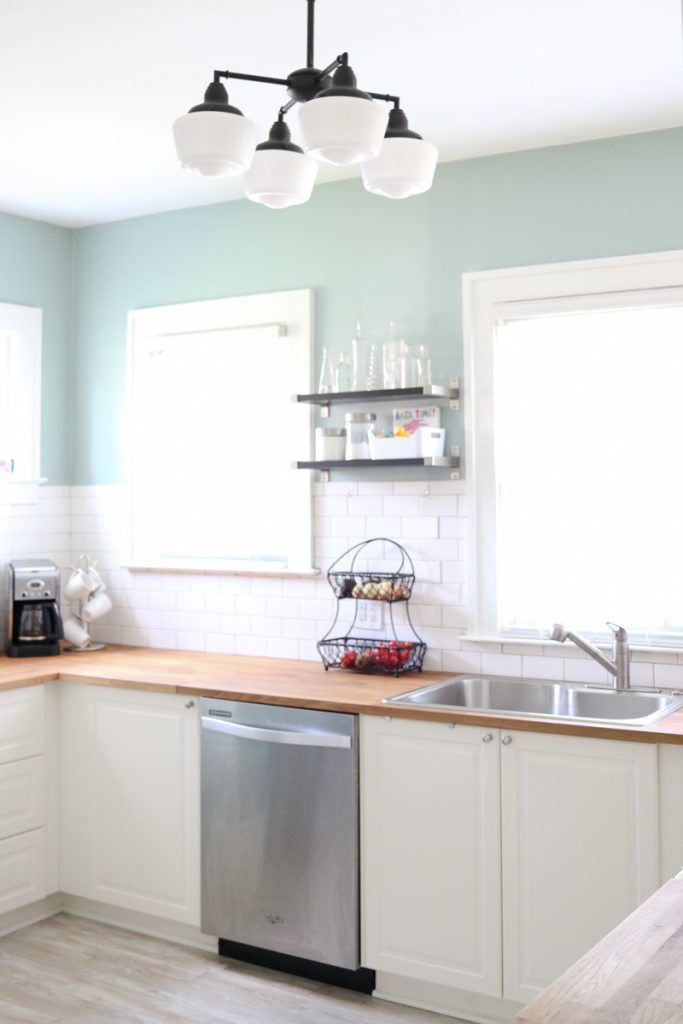
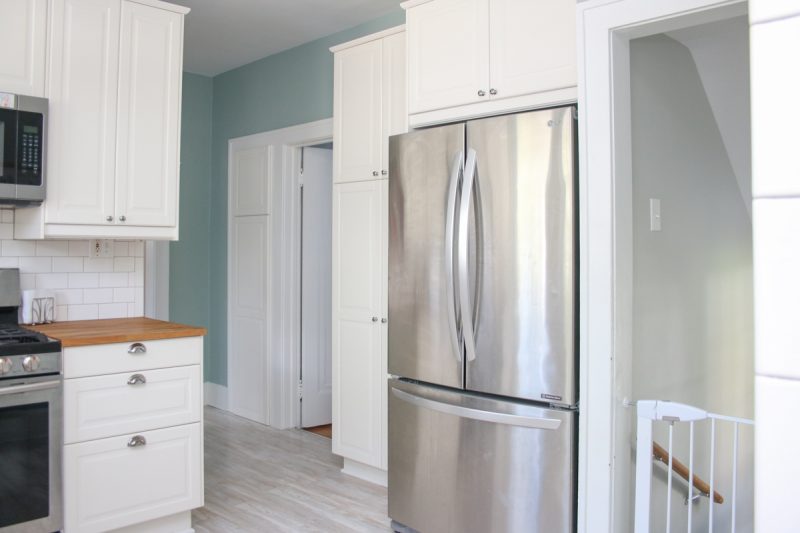
As you can see, we changed very little in the kitchen. There was no fresh coat of paint or renovations – just a few simple cosmetic changes and a whole lot of settling in.
The most significant change we made to the room was a simple one. Just like the living room, we replaced the previous window covering with white faux-wood blinds. The bamboo Roman shades that previously graced the tops of the kitchen windows were lovely (and absolutely on-trend), but you could still see through them and into the house when they were drawn closed. Our home sits on a pretty busy corner and the thought of so many people being able to peer in wasn’t sitting well with us.
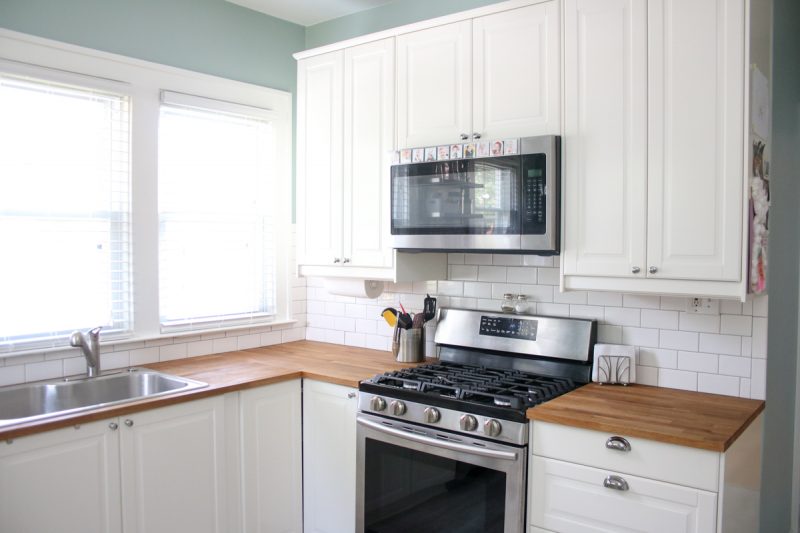
The kitchen also has three windows situated on the same wall: the two above the sink are standard size, plus there is a slightly smaller window near the back. This window was uncovered when we moved in and anyone passing by could easily get a clear view into our house at night. Our new white blinds helped to brighten up the room during the day and protect our privacy in the evening.

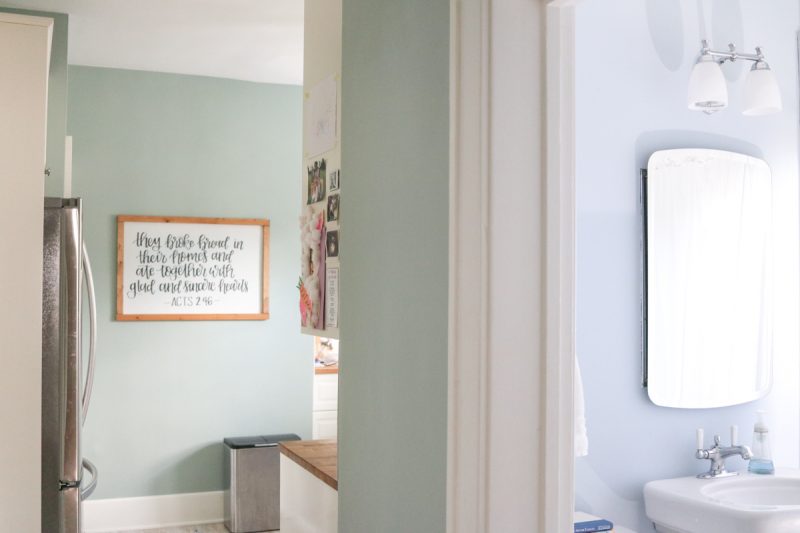
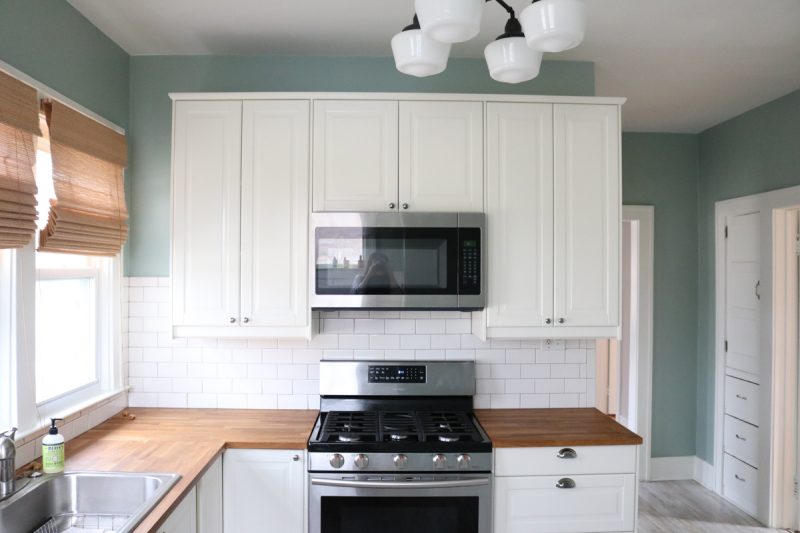
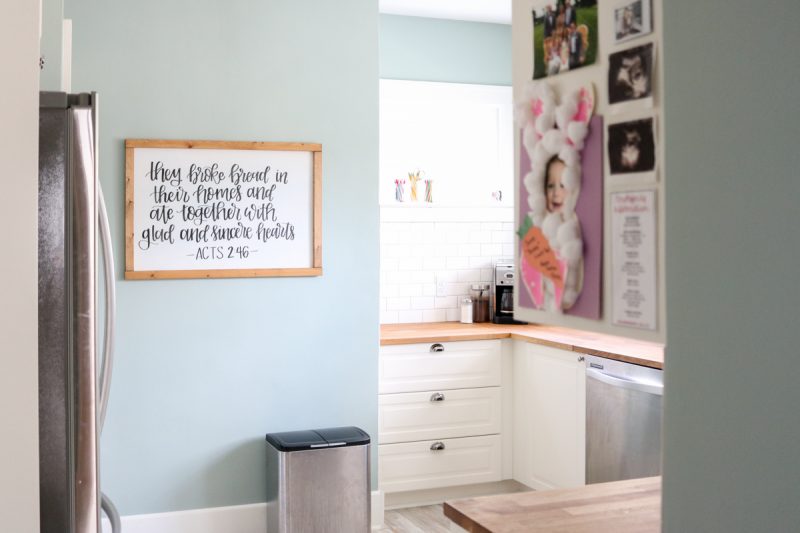
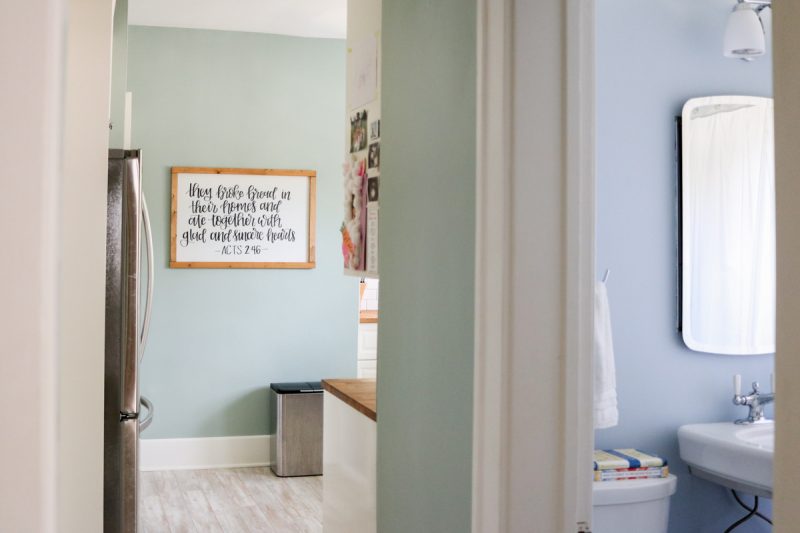
The rest of our kitchen changes were just a matter of decorating the room with our personal touches. The giant hand lettered sign from Pop Fizz Klink fits perfectly on the kitchen’s plain back wall and I love how it is the first thing you see when you enter the room. Our refrigerator isn’t magnetic, so we taped our emergency information and a few family mementos to the side of one kitchen cabinet. The little space reminds us of what matters most, without providing visual clutter in a prominent area.
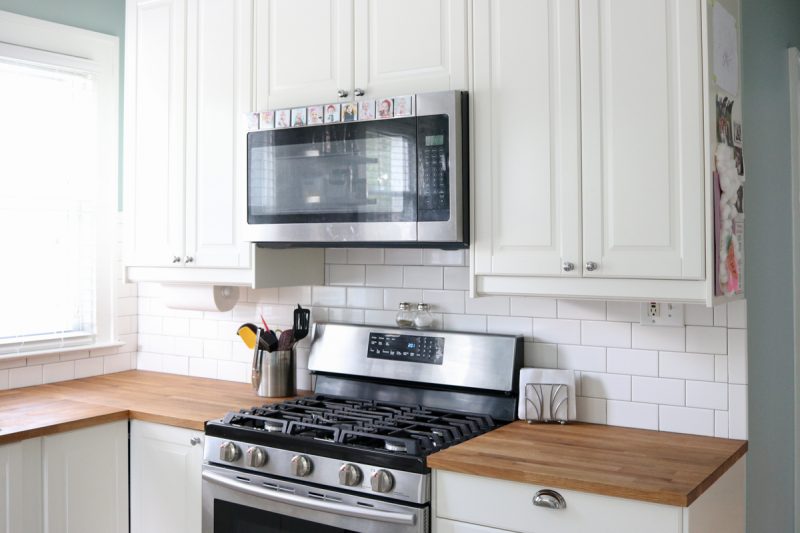
The one and only thing I miss about our the refrigerator in our old house is that the adorable square magnets I had made with Dessa’s photos stuck to it. I had to get creative and find a new way to display those adorable little squares. As it turns out, they line up perfectly across the top of the microwave (which, thankfully is magnetic!)
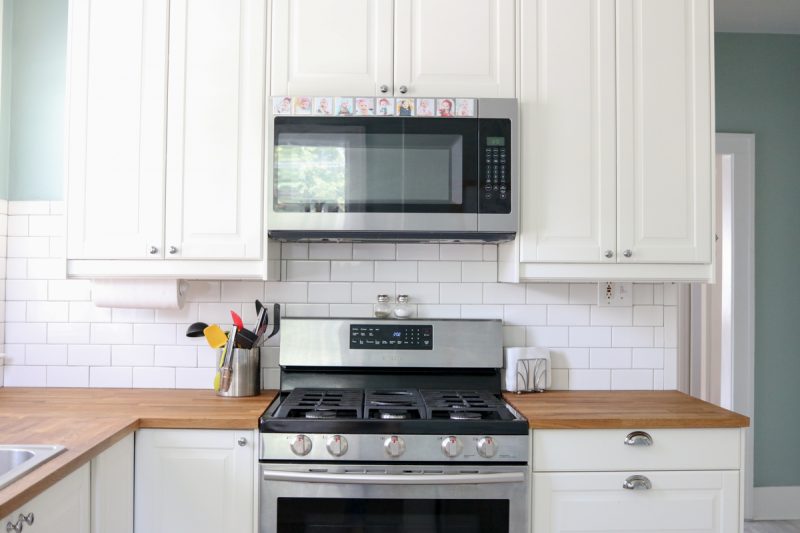
I seriously cannot say enough good things about these little magnetic photo squares. They’re from Social Print Studio (a little-known company that has some seriously creative photo gifts. You can get $5 off your first Social Print Studio order if you use the code 4MARIAHMT3 at checkout. I get $5 off if you use my code too, so it’s win-win!)

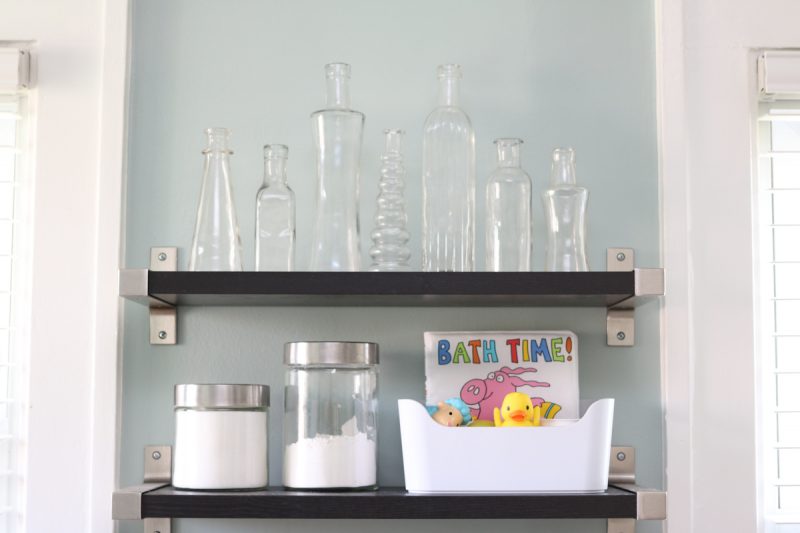
The rest of the kitchen is set up based on practicality. The two floating shelves are a great use of the space, but I know I will never, ever place any type of open surface or container that I intend to eat or drink out of because the shelves almost never get dusted.
The top shelf is really difficult to reach, so I placed several vintage style bottles that are left over from our wedding on it. There are a few small decor pieces from the wedding placed throughout our house and it always makes me smile to have little reminders of a very special day on display in a practical way. As for the bottom shelf, it is all function. Dessa’s bath toys are cozily tucked up out of the way, along with canisters of flour and sugar.
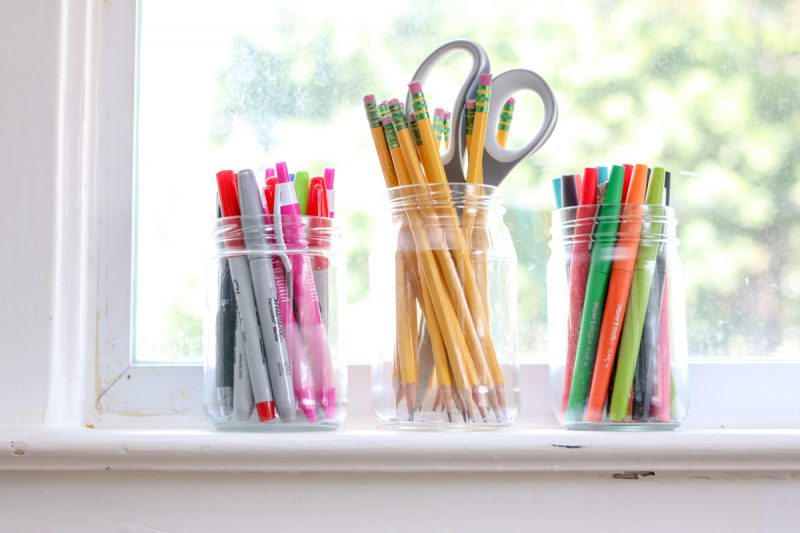
It’s not the best long-term solution, but we have been storing a few glass jars with writing supplies in the back kitchen window. This window sits very high up and any type of shade or blind would be impossible to reach without a very long cord. You can see kitchen lights and the top of the cabinets above the stove when you look in from the street at night, but not anything that is happening inside the kitchen – which makes the window functionally private. One day I want to place a panel of leaded glass inside of the window frame (similar to this design) to add a little extra privacy. It will also tie in nicely with the leaded glass windows I want to purchase for the square windows on each side of our fireplace in the living room when our house is viewed from the street.
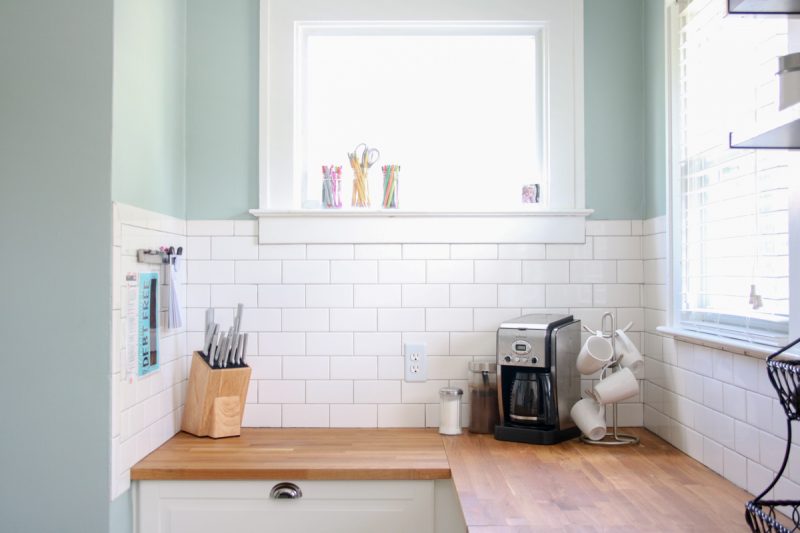
As for the pens and pencils, I may not be in the classroom this year, but my love affair with Sharpies, Flair Pens and Ticonderoga pencils is still going strong and this is a pretty good temporary home for them.
Kitchen Checklist
✓ Replace bamboo Roman shades with white blinds
✓ Add blinds to third window
✓ Hang “They broke bread …” scripture quote
Find new canisters for coffee and decaf
Find the perfect nook to store pens and pencils
Find and install leaded glass over back window

With our kitchen tour complete, let’s move a few steps backward so I can show your our newly improved bathroom and hallway …
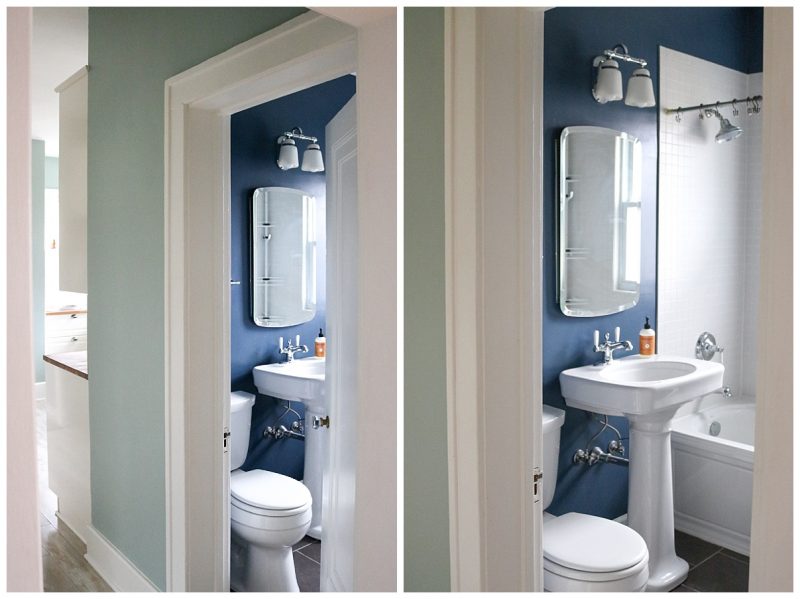
Bathroom: Before
I knew as soon as I stepped foot into the bathroom when we bought the house that the wall color had to change. Don’t get me wrong, navy blue walls looked so crisp against the white porcelain and silver fixtures. It truly was beautiful, but it wasn’t my taste at all. I prefer light, airy colors, especially when there is limited natural light.
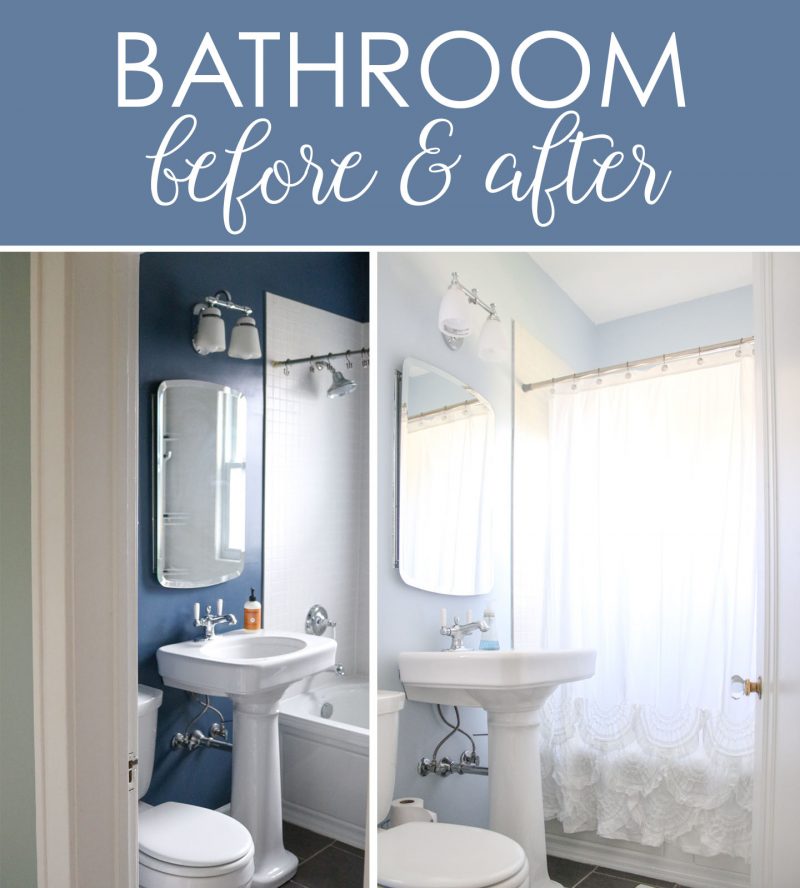
Bathroom: Today
We knew the paint color would change, but we also decided to make a few additional small changes to the bathroom after we moved in to the house. The light fixture above the sink was beginning to rust, the shower head had far too wide of a range for our narrow tub, and I wanted to swap the towel bars in the bathroom with simple hooks. The fixtures were simple to replace, but painting the walls proved to be a significant challenge. Just like our dining room ceiling, it took four coats of paint (two coats of primer, plus two coats of Beacon Gray from Benjamin Moore) to fully cover the navy blue walls.
The ceiling also received a fresh coat of paint, which proved to be our downfall. After a few days, the ceiling began to bubble, then peel. Rob sanded and patched the peeling areas, gave everything a fresh coat of paint (including the top edge of the walls), only to watch the ceiling paint deteriorate once again. It took another round of scraping, sanding, and painting (starting with an oil-based primer) to finally get the peeling under control. Right now the ceiling looks pretty good, but will still require our attention down the road.
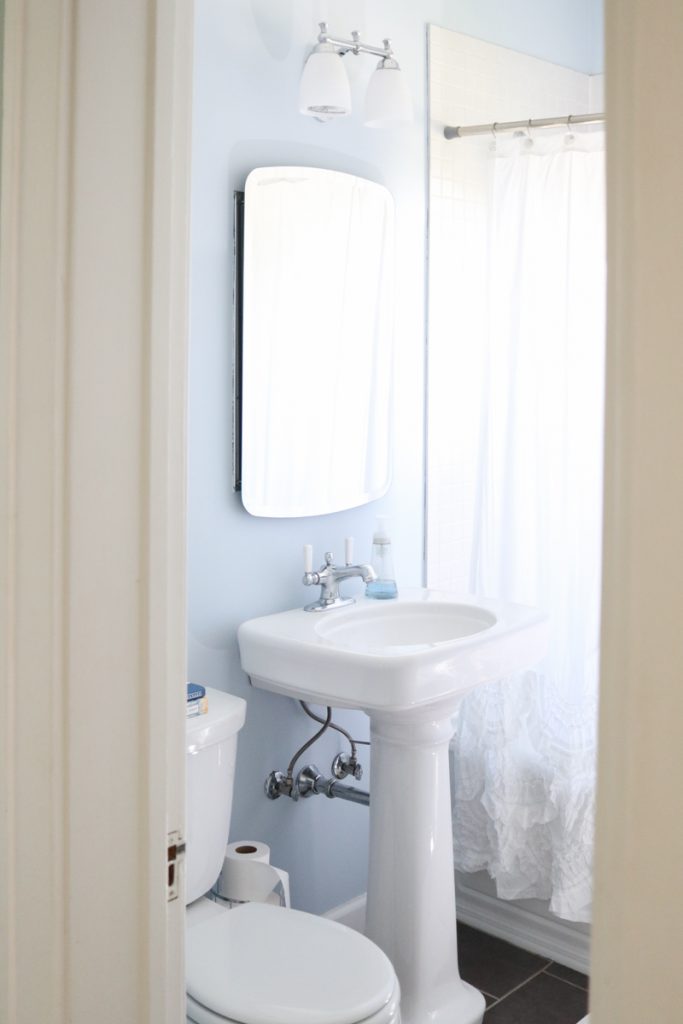
Despite the incredible hassle, I’d say that our new bathroom was worth all of the effort. The soft gray-blue tone from the Beacon Gray paint color transformed the bathroom into the tranquil oasis I had been dreaming about.
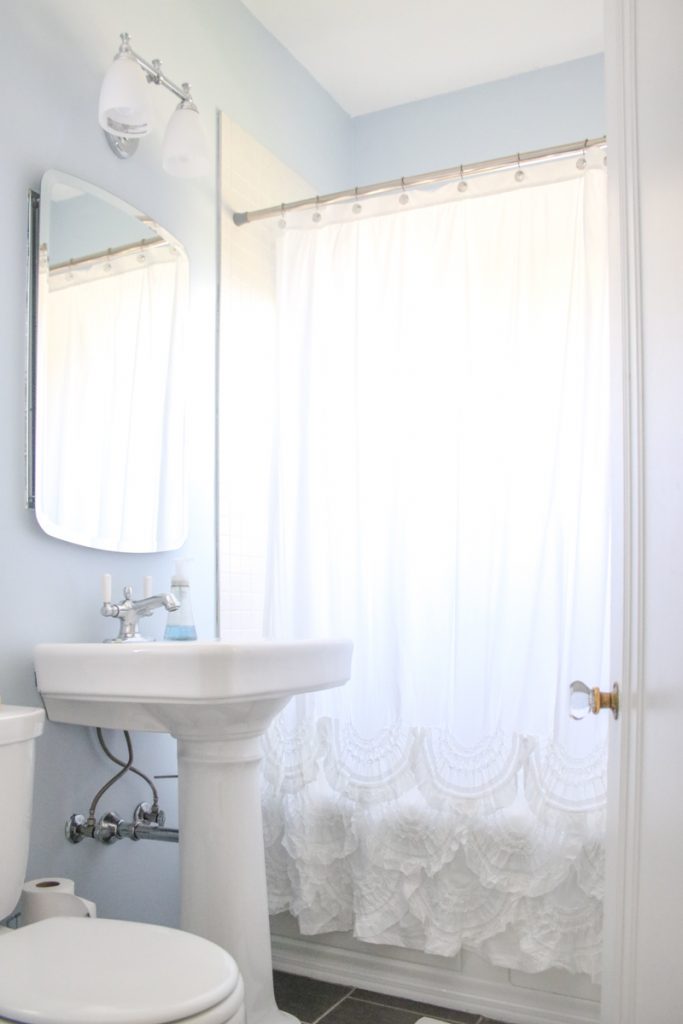
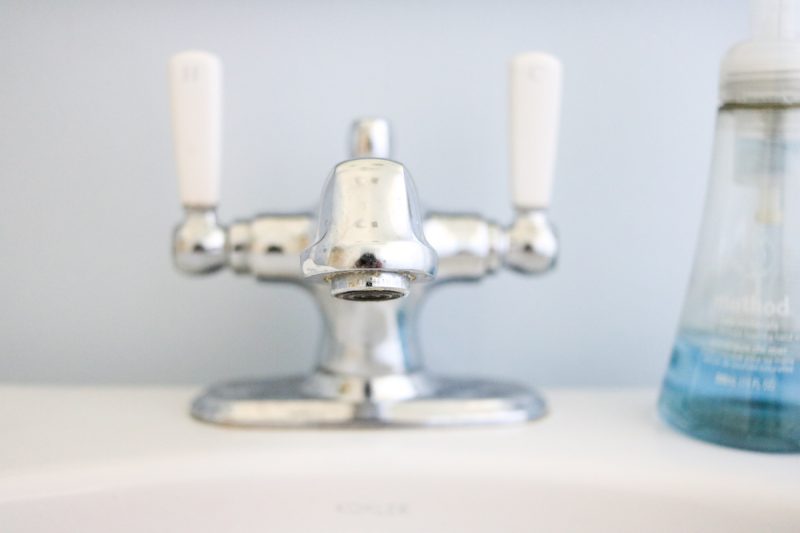
I especially love how the paint color softly accents the chrome faucet and fixtures.
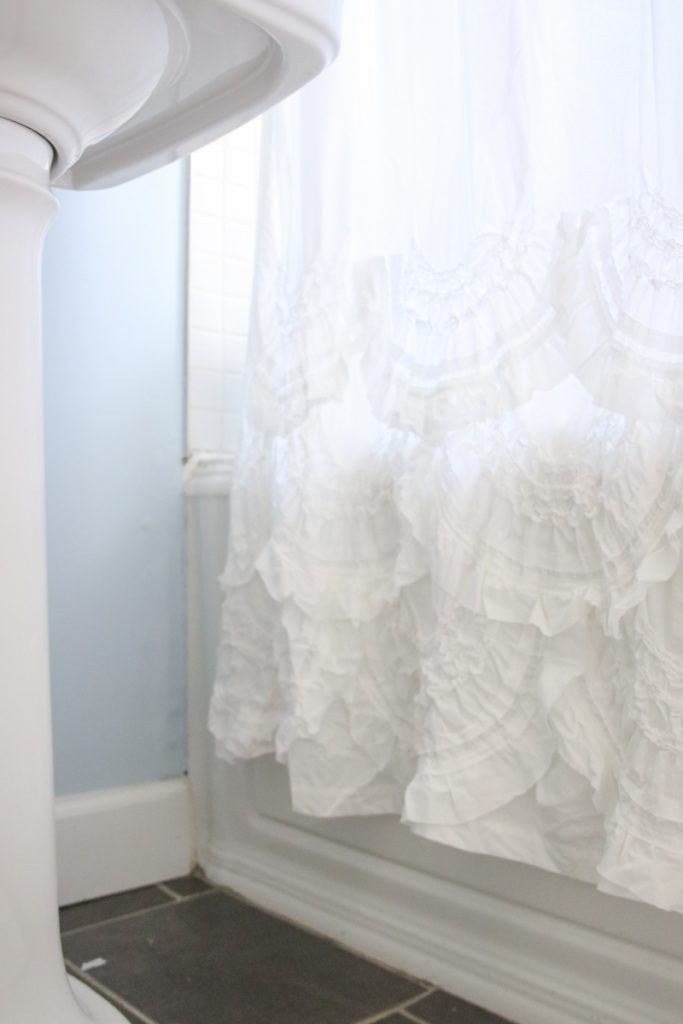
The previous home owners left their shower curtain rod and hooks behind, but they had a dark metal finish, which may have blended with the navy blue walls, but definitely didn’t fit the soft atmosphere I was trying to create. Those pieces were quickly replaced with silver tone accessories. I wanted to finish the area with a crisp white shower curtain and I fell in love with the Rivulets shower curtain from Anthropologie. Our tiny bathroom doesn’t leave very much space accessories or other decor and I love how the ruffles and tufts of the curtain brings so much personality into the tiny little bathroom.

As for the rest of the room, we still have a bit of work cut out for us. I intend to add a few framed phots on the wall – including one of Dessa enjoying the tub for the first time. I’m also dying for a bath mat upgrade. Our plain white bath mat from Target works just fine, but I have my eye on a few different bathmats from Anthropologie. I’ve just been debating which one would be the best fit for the personality of the room. When the time comes, I may have to order one of each and try them out in the bathroom to figure out the best one.
The ceiling paint needs to be permanently fixed at some point down the road, but in the meantime, I think the room is shaping up nicely!
Bathroom Checklist
✓ Repaint walls a lighter shade of blue
✓ Replace shower head
✓ Replace shower curtain rod & hooks
✓ Find and hang a classic white shower curtain
Replace bath mat
Find and install wall art
Permanently fix peeling paint on bathroom ceiling
With the bathroom settled for now, there’s just one little nook left to show you during this updated tour of the house.
Hallway: Before
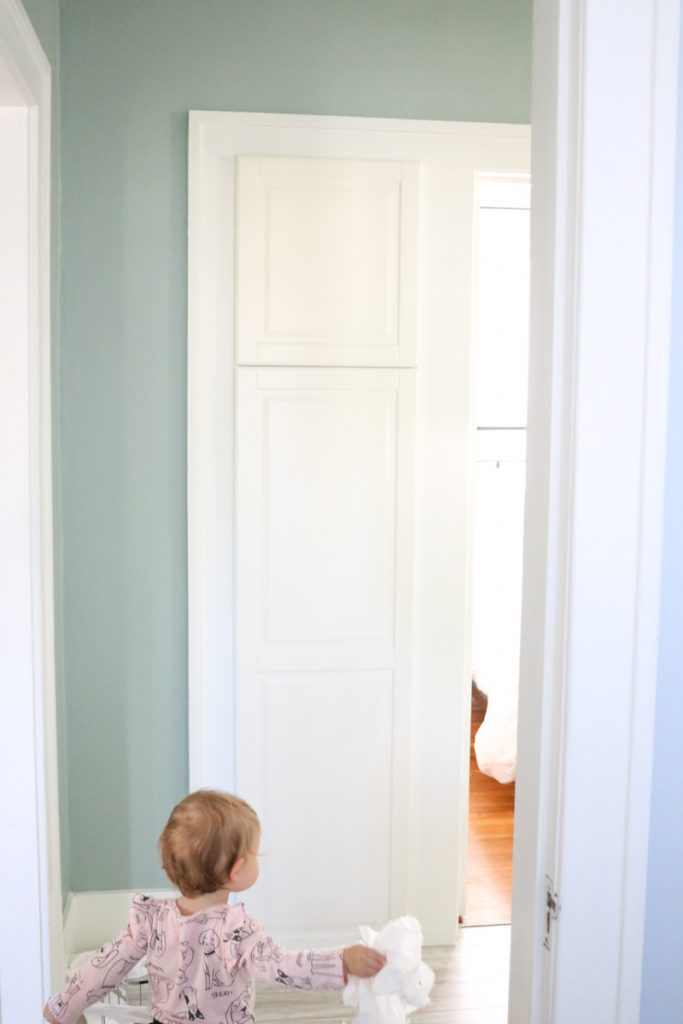
I’ll admit that using the word “hallway” to describe the area outside of our bathroom is a bit generous for the space. It’s more of a nook at the end of the kitchen.
No matter what you call it, there is a small walkway of sorts which contained a modest built-in cabinet and drawers. It was such a handy little place to store bathroom necessities, but the cabinet was dingy. I’m sure the built-ins were original to the house, but unlike the built-in living room cabinets, these were completely lacking in the charm department. The edges of the wood were rough and damaged, the inside of the drawers were stained and smelled funny, and the cabinet door wouldn’t stay closed.
Hallway: Today
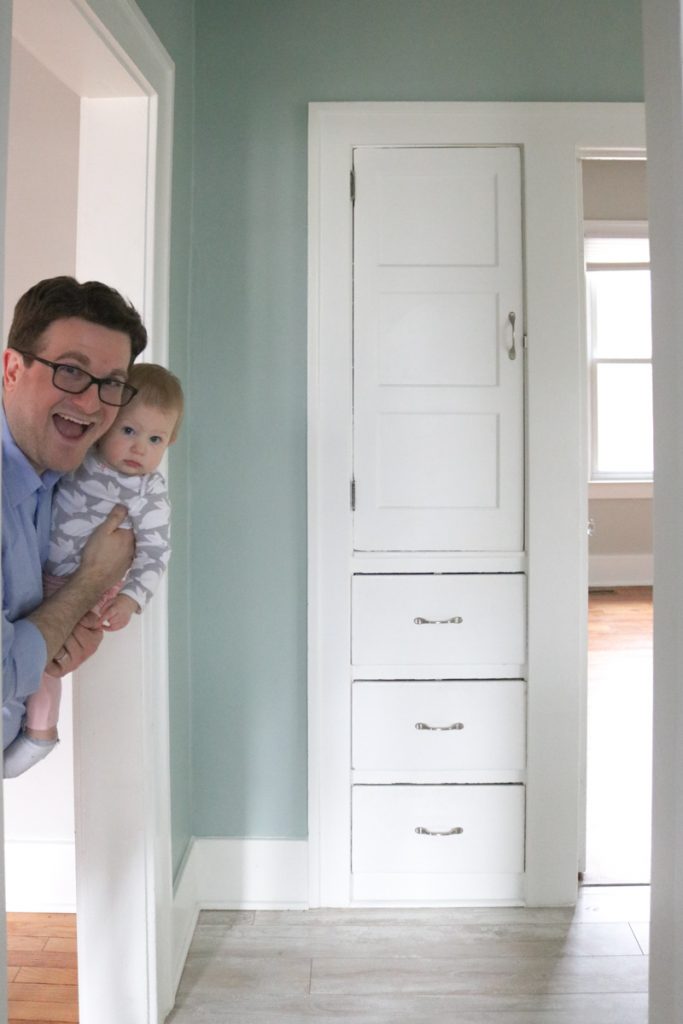
Our new built-in linen closet now looks like a million bucks. Since our kitchen cabinets are all from IKEA, our contractors ordered a matching cabinet with stacked doors to replace the old built-ins. They new cabinet wasn’t quite a perfect fit, but the contractors did a little magic and made it work. We are absolutely in love with this new space and we especially adore how it naturally flows from the kitchen.
The view from the bathroom is so much cleaner and more polished than it was when we moved in – who would have guessed that IKEA would have the perfect solution to our dilapidated built in cabinets?
And there you have it! I would love to know what you think about our home so far. Would you have kept the navy blue bathroom walls or do you think the soft shade of blue was a big improvement? I always love to know what you think, so please share your thoughts in the comments! And be on the lookout for a bedroom update – which will land on the blog next week!


I love home improvement posts! Your updates are so pretty! I like the lighter bathroom paint and the shower curtain as well. Everything looks clean and fresh and not at all cluttered. Great job!
Thank you so much, Susan!
I love it all!! Jill
Your house is so beautiful and homey! You guys are doing a great job with the updates. I love your style!
I definitely think the softer grey blue paint is so much better than the darker navy. Such a fresh look! Have you decided on a new bath met? Of the three you shared, I love how the first and third mimic the shower curtain. Your bathroom is lovely!
I’m leaning toward the first and third also. I haven’t reached a decision yet – I got distracted by the new sconces we recently ordered for our bedroom! That update is coming soon and you’ll see why I can’t wait to have sconces hung by the bed. I’ll have to keep you posted on the rug situation ;)
Great job! It all looks so light and airy…goals achieved. I love the third rug, it would look great with your shower curtain IMHO! -my humble opinion!
Also, I loved our faux wood venetian blinds when we first bought them for our new to us house, but I am finding them a bear to keep clean. It’s not like they just get dusty, they truly get dirty. I feel like they constantly need wiped down and it is time consuming…and they still don’t look completely clean. Do you find you need to dust them often? I love the look.
That is so interesting about your blinds! We had the same style of fake wood white binds in our rental house and I didn’t really notice them getting dirty. I’m also not the world’s greatest housekeeper (I prefer to tidy up than deep clean) so it’s possible they got dirty and I truly never noticed. Now I’ll have to be on the lookout with these blinds to see what happens.
I really love your photos and stories. It is so inspiring to see what you have done with your new home. We have an older home also and it needs a lot of work.
I am also happy to read that you are staying home with your new baby. It is impressive—I know that you worked so hard to make this possible financially. I am sure that others are inspired by you as well.
The work on the house will never end, but we always feel such a huge sense of accomplishment when we are able to knock off an item on our home repair list. And thank you – I’m overjoyed to have the extra time with Dessa. It did take a lot of work to get on solid financial footing, but it was (and continues to be) worth all of the sacrifices to get here.
I love the new cabinets in the hallway; they blend right in. Your house is really looking beautiful! I did not realize until I read this post that you are staying home with Dessa right now. I just wanted to put in a word of support. When I had my first kiddo, I had to make that really tough choice as well: keep working and try to make it all work, or slow down the pace and enjoy life. Since I was-ahem- an older mom when I had my first, I quickly realized that this was a special time that I could never get back. Walking away from work was a really hard decision, but here 15 years later, I do not regret it at all. I am just so thankful I have been able to enjoy every age and stage. It only comes around once for each kid.
Thank you so much for all of your sweet words! I’m a bit of an older mom myself (40 is coming sooner than I would like to admit) and all that I want to do is slow down to enjoy every minute. She will be big soon enough and there’s no turning back once the frenzy of sport schedules, homework and school comes around. This truly is the best season of my life and I’m so happy to share it with Dessa.
Wow! I am finally catching up on your before and after blogs this evening. I love your aesthetic and you have a great instinct for when to go for it on a high end item and when to use a less expensive look alike. Your shower curtain is KILLER!!! I am looking forward to the day you get your master closet project finished!
Any guesses on what color your kitchen is? I love the depth to the blue-green-gray. Love the color scheme of your house- so calm and serene!