As much as I have loved sharing updates of our home’s lower level with you, I have been anxiously awaiting this particular post. The second floor of our house is broken into three distinct parts – a bungalow style living space, our master closet, and an unfinished storage area that has appropriately been dubbed “the attic”. The bungalow of our home is my favorite space in the house and it is always the room that catches visitors by surprise when they come up the stairs. There are just so many things to love – the low, vaulted ceilings, the tranquil paint color, the sliding barn doors, the exposed brick from the chimney, and the cozy nooks and crannies. There is something uniquely special about this room and, even though we most often refer to it as “the playroom”, the space is loved by children and adults alike.
This post contains affiliate links. We earn a small commission each time someone makes a purchase through one of our links, which helps to support the blog and our family.
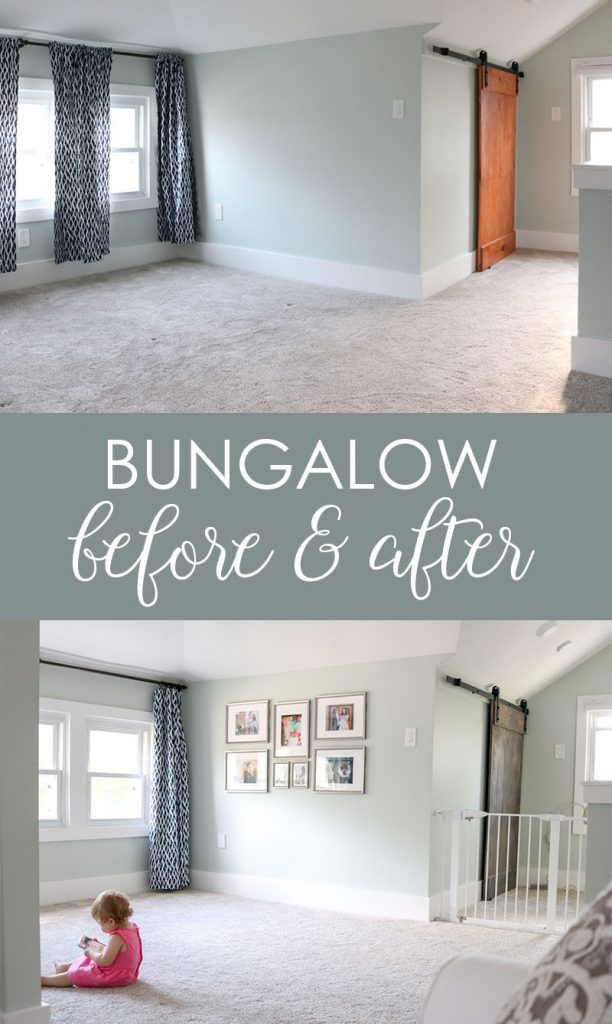
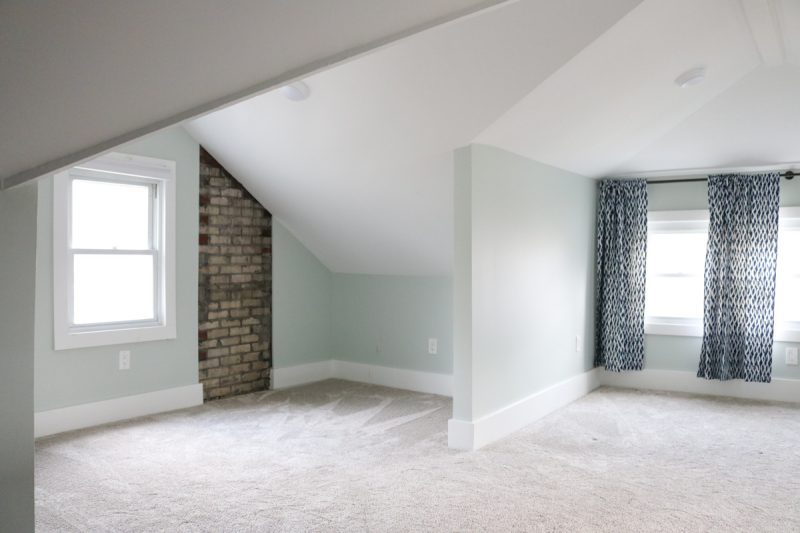
Bungalow: Before
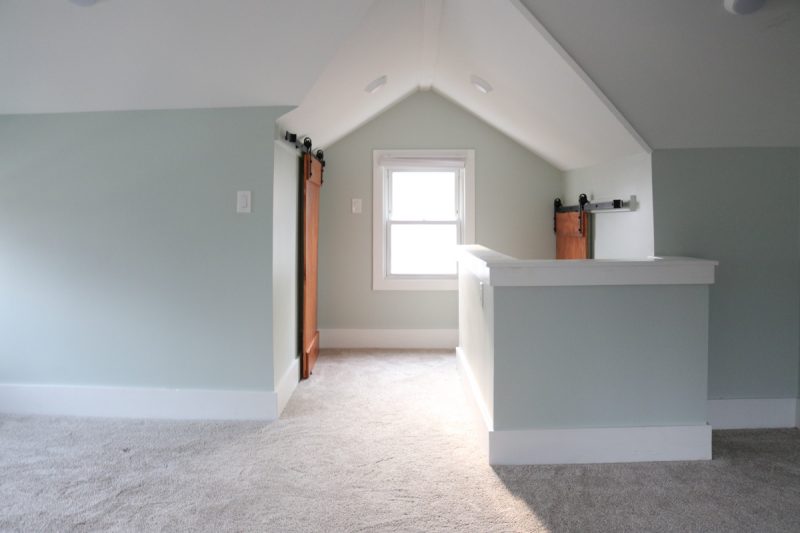
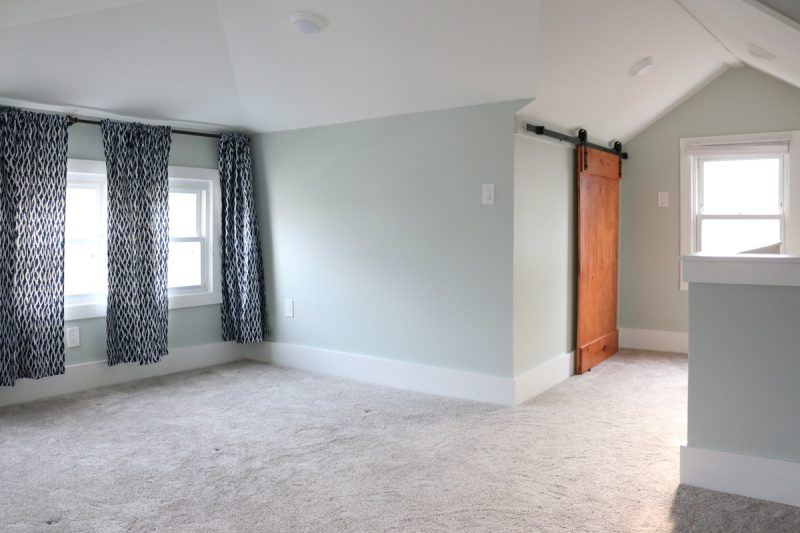
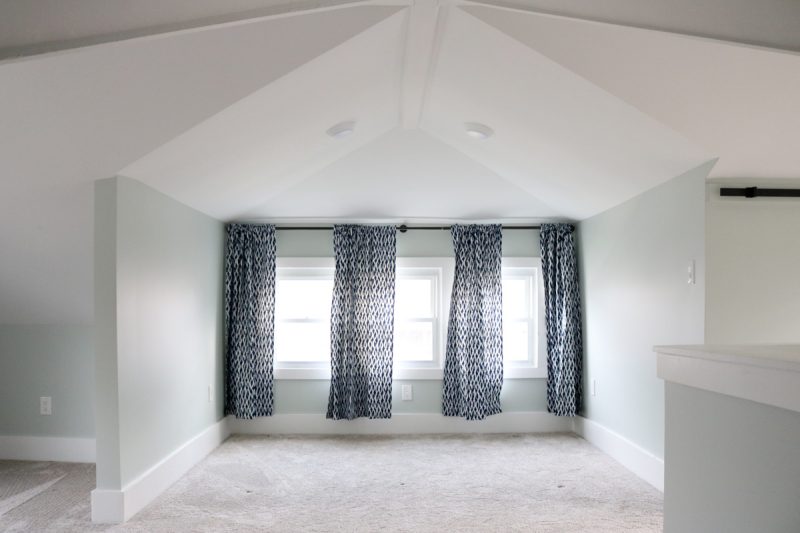
Like most older homes in our city, our 1925 house is a bungalow – which means the second floor has low ceilings and an interesting use of space. We really hit the jackpot when we purchased this home because the previous owners had amazing taste and did so much to update the house before selling it. I can’t take any credit for the gorgeous backdrop they created in this room. Everything from the carpet, barn doors, curtains, SeaSalt paint color from Sherwin Williams – even the lighting was thoughtfully selected. The previous owners had used this space as their master bedroom suite and it’s not hard to see why. Their queen size bed fit perfectly under the bank of windows and they had a sweet little seating and desk area off to the side. Here is how the space looked when we first moved in.
Bungalow: In Progress
Of all the rooms in the house, the bungalow area has evolved the most since we moved in. We knew we wanted to make this a play space for Dessa and we also knew we wanted to incorporate adult seating and a television upstairs, but we weren’t at all certain of the best configuration to suit our needs. For several weeks, the space was completely unfurnished (which didn’t stop Dessa from wanting to come upstairs to crawl around and play) and I considered creating a new project on Modsy for layout ideas for this completely unique space.
One change that we quickly made for the room was one I knew I wanted the moment that we bought the house. We stripped the barn doors and had them refinished to coordinate with the neutral tones of the room. No more orange-tone doors. Instead, I selected gray stain for the doors to tie in the gray tones of the exposed brick from the chimney. The resulting color was much softer, more calming and exactly the look I was going for.
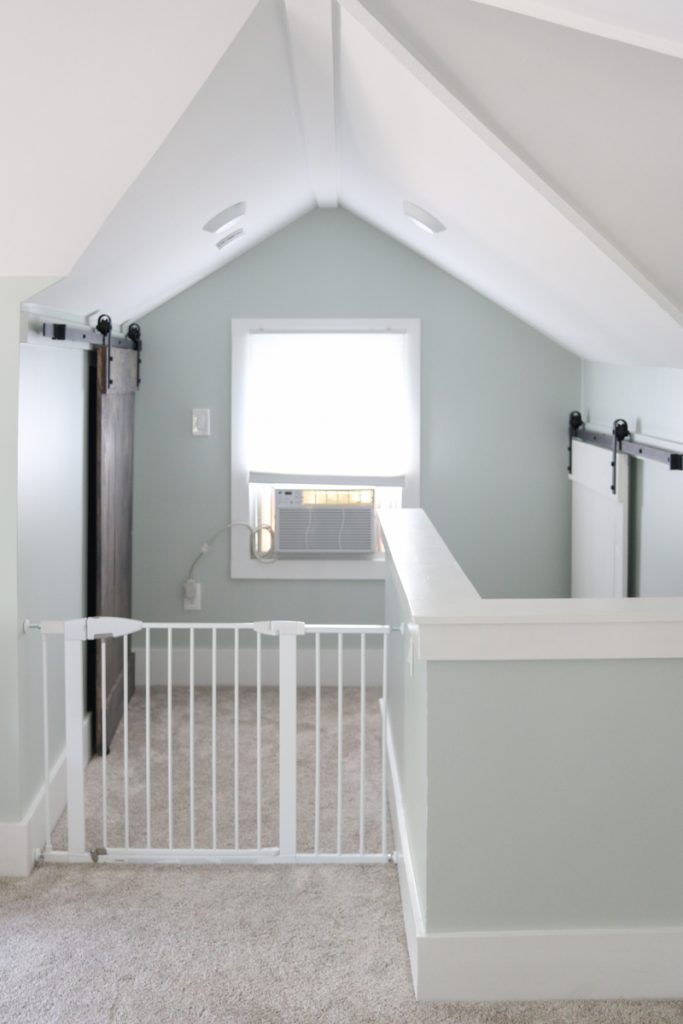
Unfortunately, we ran into some trouble when it came time to stain the smaller sliding door. Rather than absorb the stain, the pigment just sat wet on the surface of the door. It didn’t matter how long we left the stain on the door in the hopes of letting the color seep in, every bit of the stain wiped clean off the wood. It was like trying to stain a piece of plastic, which was so unbelievably strange and frustrating (especially for my Dad, who kindly offered to strip and refinish the doors for us). The barn door wouldn’t accept any stain no matter how hard we tried, but it was very easy to paint. Left without many options, we ultimately decided to paint the smaller door Benjamin Moore Simply White to match the trim upstairs.
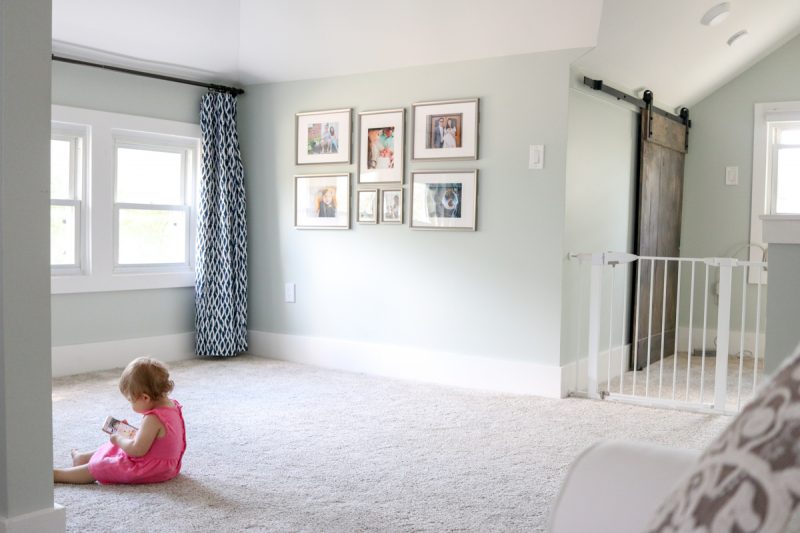
As annoying as it is that the doors don’t match, it’s a detail that most of our guests never notice. People tend to notice the white door as they climb the stairs, then see the gray door after they turn the corner at the top of the stairs. At that point, the white door is tucked conveniently out of view by the half wall and it virtually disappears from sight. I go upstairs a few times a day and even I completely forget about the difference while I’m in the bungalow. Even though the two different door finishes seem quite jarring in the above photo, nobody ever stands in that location and looks toward the two doors. Ever. Everyone’s attention is naturally drawn to the other end of the room where all of the action is happening.
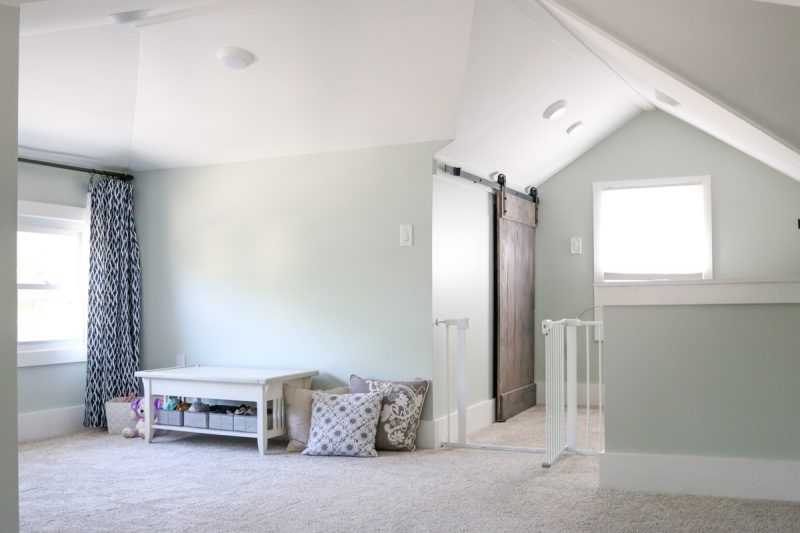
With the barn doors finally settled, small pieces of furniture slowly made their way upstairs while we tried to figure out the best layout for the room. Our first experiment was to drag up our coffee table from the living room. The table held most of Dessa’s toys and at the time and it was a natural starting point for us. We also tucked a few throw pillows from the living room beside the coffee table to soften the space a bit. The colors of the pillow blended perfectly with the neutral tones in the room (and that stunning gray door.)
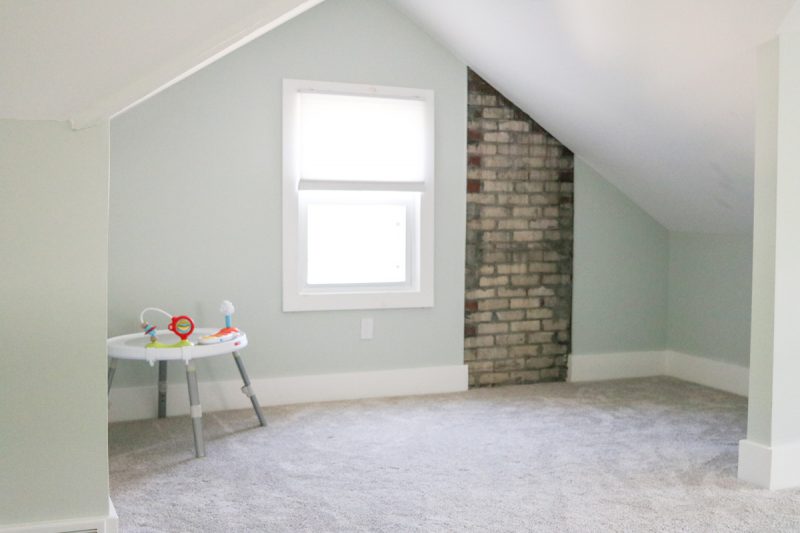
We placed Dessa’s Skip Hop activity center into the far corner of the room to while we tried to figure out the best use of the space. Even though it looks a little awkward, the empty room was so much fun for my little crawler. She loved scooting back and forth between the two spaces and squealed with delight when we hid on one side of the wall that separates the two spaces to play “boo!”
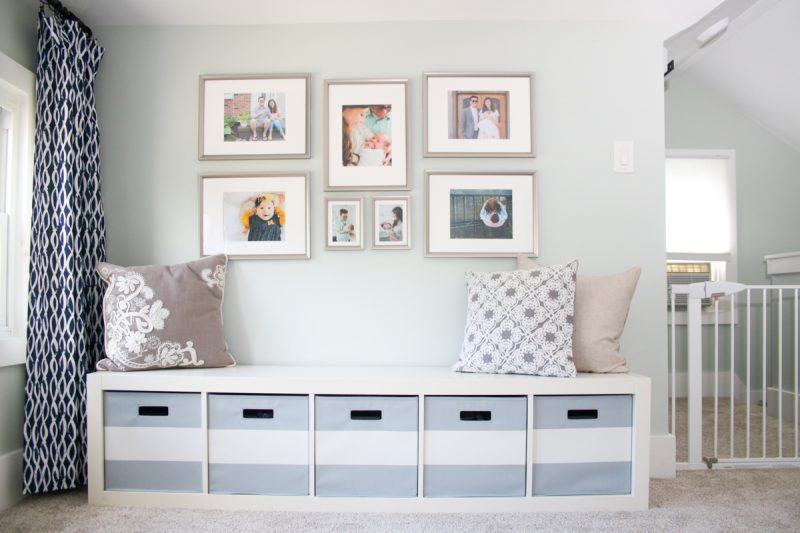
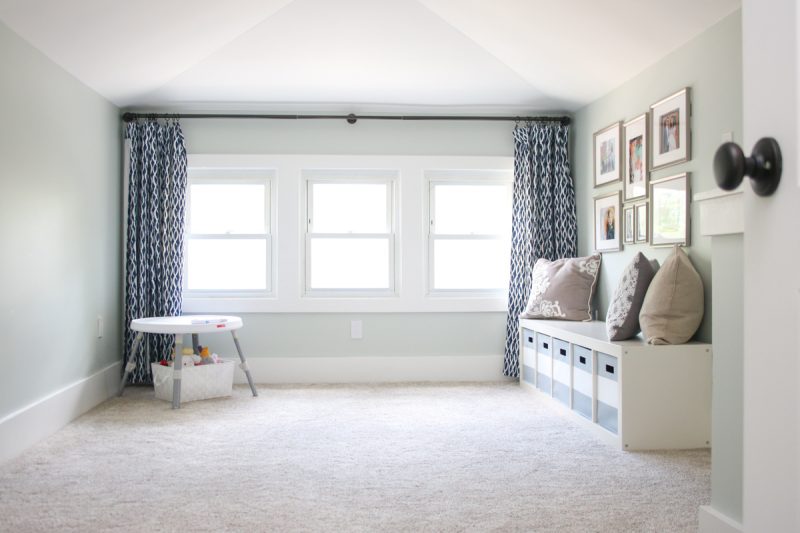
Eventually, we decided that the coffee table wasn’t the best piece of furniture for our little playroom. I brought my IKEA bench (similar here) home with me when I moved out of my kindergarten classroom this summer and knew that it would fit perfectly in our bungalow playroom. The coffee table went back to the living room and was replaced by the shelf/bench. We also created a miniature gallery wall using a few repurposed frames from the living room decor we set up in our rental house (as well as the condo we rented.) The same set of pillows that had previously sat beside the coffee table fit perfectly on top of the bench. The look was completed by five gray and white striped fabric bins from Target that kept all of Dessa’s books and toys conveniently tucked away.
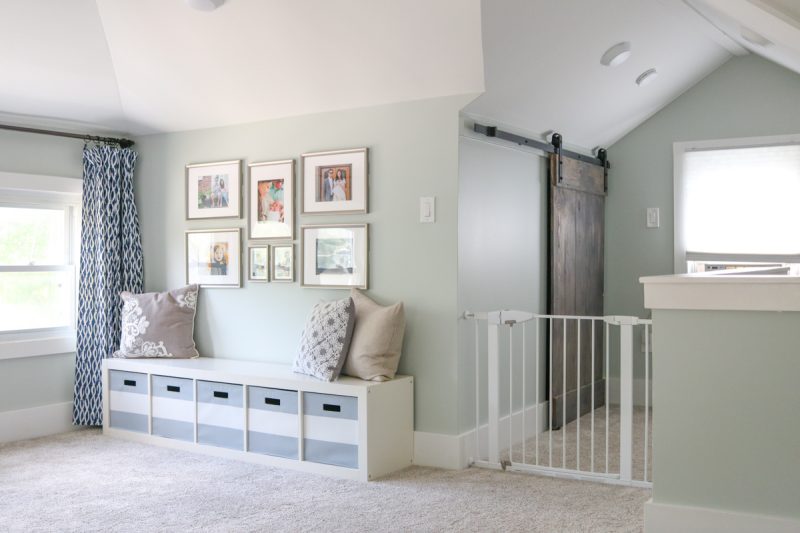
We moved Dessa’s little SkipHop Activity Center under the bank of windows with a small basket of her most frequently used toys. And just like that, our playroom started coming together.
I can’t deny that I adored this setup while it lasted. The central part of the bungalow was so charming and sweet, it helped me to realize that the best use of the space upstairs was to set up the center area as a playroom for Dessa and to use the little side room as a cozy living space. Once we had a vision, the unfurnished little nook to the left was feeling especially stark. So we slowly began to furnish that space to be a cozy little escape from the rest of the house.
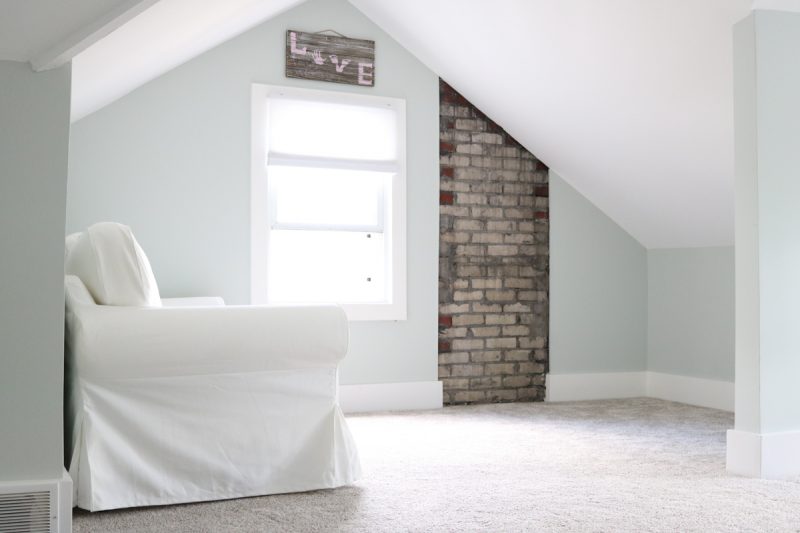
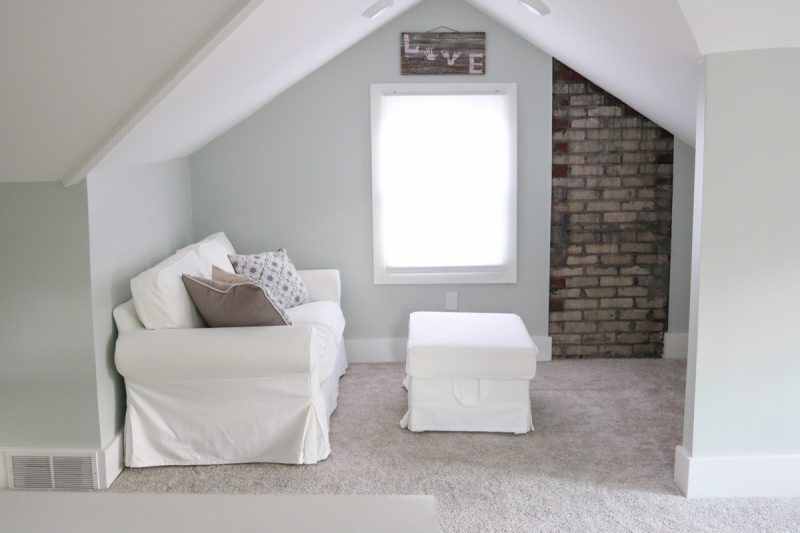
We hung a sweet little “LOVE” sign that Dessa made with her nanny as a Mother’s Day gift above the window and were overjoyed when we measured the space to discover that the back wall was the perfect size to accommodate a loveseat. We took a leap of faith and purchased an IKEA Ektorp loveseat with a white slipcover. (Yes, you read that correctly – white!) Like I said, it was a leap of faith. The rest of the pieces soon fell perfectly into place.
Bungalow: Today
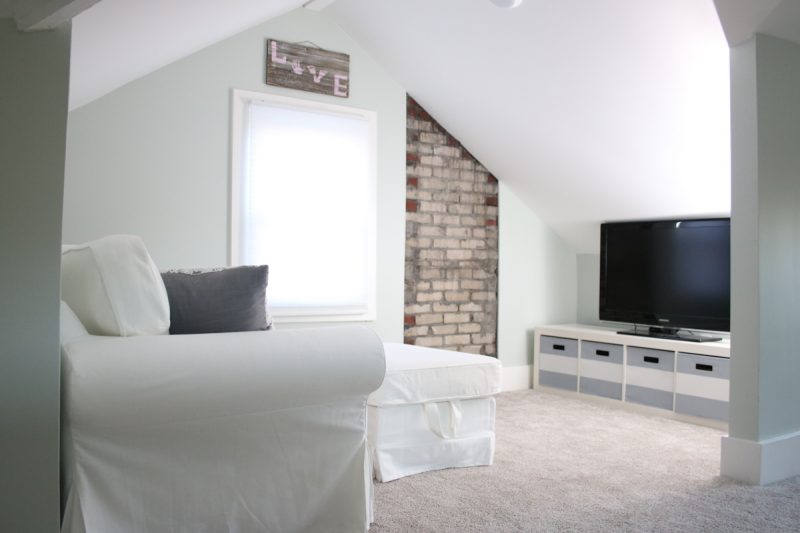
Adding a loveseat to the bungalow gave us the push we needed to finish furnishing the living area. We loved the loveseat, but we had a real need to put our feet up and relax at the end of the day. So we purchased the matching ottoman from IKEA and moved the bench/shelf into the nook so we could use it as a TV stand. The long, skinny shelf fit like it was made for the space and was the ideal size to hold a 40″ TV. We also moved the throw pillows again. They now reside on the sofa. It took a little time, but Rob and I finally have a cozy little retreat to enjoy after we put Dessa down for the night.
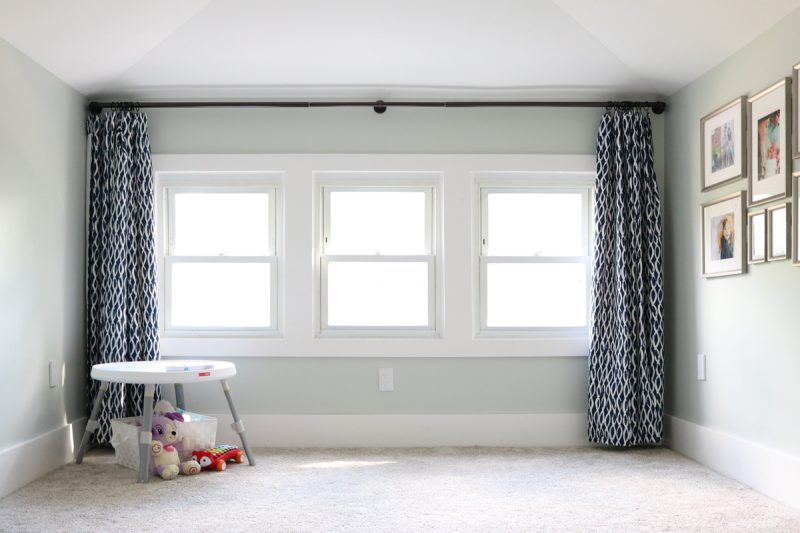
As for the play area, it’s not as bare, sad and lonely as you might think without the bench.
The play area is certainly lacking in the furniture department, but we left the gallery wall up and it helped to make that part of the room feel more settled and less like a space that desperately needed furniture. Dessa has recently discovered the joy of spinning in circles to make herself dizzy and I’m kind of relieved that we don’t have any wood furniture or sharp corners in her play space right now. I adore how her playroom looked when it had the bench seating and a part of me is considering purchasing a matching shelf and bins down the road, but I’m content with our set up for the time being.
Future Plans for the Bungalow
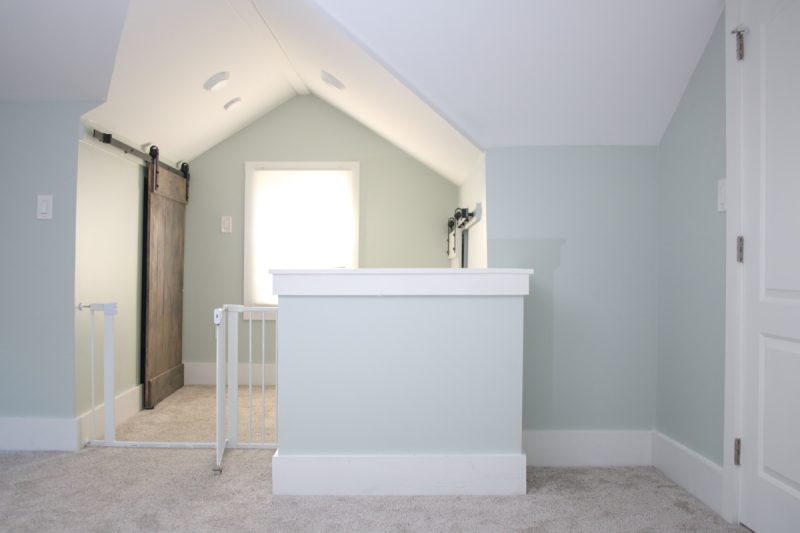
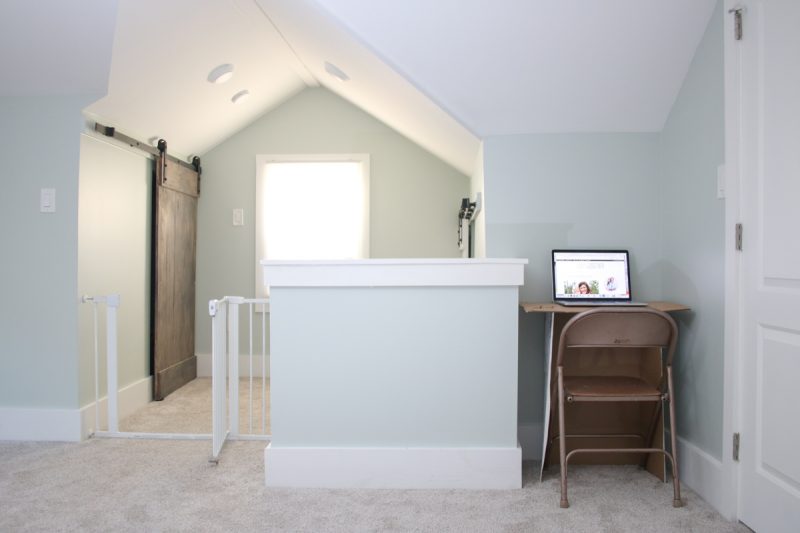
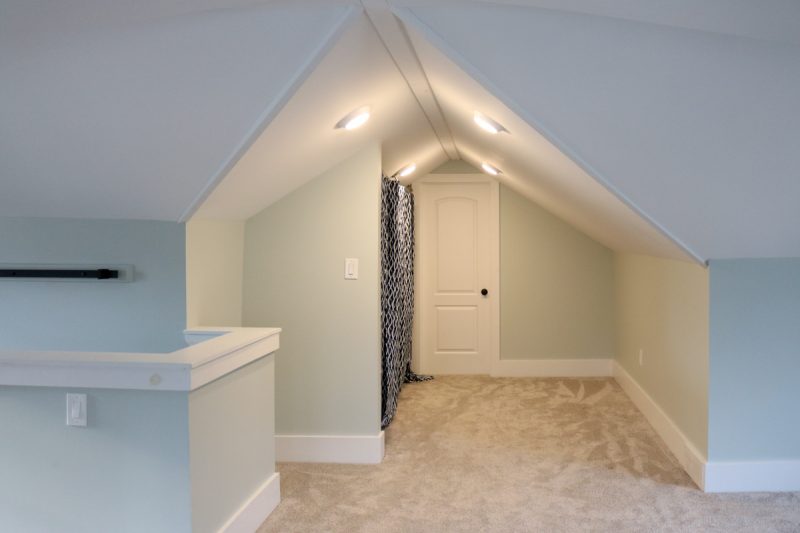
Like every other room in the house, isn’t quite finished yet. Rob and I often bring Dessa upstairs with a laptop under one arm with the hopes of getting a little work done while she entertains herself. We can sneak in a little work if we sit on the loveseat, but Dessa usually sees and wants to snuggle up while we work, which quickly evolves into a battle over the computer. There’s a tiny little nook between the stairs and our master closet that we’ve been thinking about making into a workspace.
I know it looks really tiny but we tested it out with a folding chair and all sorts of structures built from oversize cardboard boxes and we think it just might be the solution to our problem. I can’t believe I’m showing you this, but here is the cardboard box/tabletop set up – complete with a junky folding chair. We wanted to really test the space and see how it feels to sit in the nook before we invest any time, money or energy into creating a work area. Yes, it’s a small nook, but there’s surprisingly plenty of room for a laptop with space to spare for our arms and hands. We’re even thinking of adding a little floating shelf above the desk.
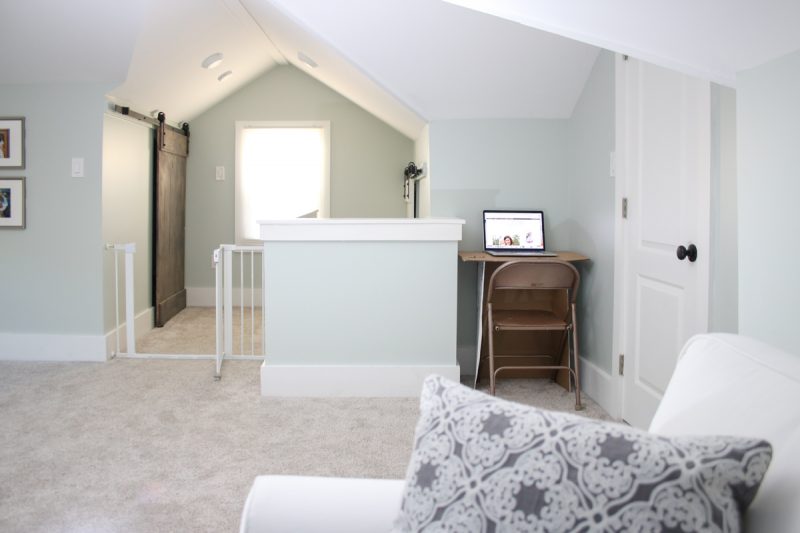
And just to help you really visualize the space, here’s how it looks from the living area. Not too bad, right? I really think it could work as a little workspace that we could use while Dessa plays upstairs.
The work area would be really simple to knock out. All it really needs is some bracing and a mounted wood slab to act as a desktop that we can paint to match the trim, along with a chair. I can visualize the desk without any problems, and I’ve been trying to figure out the best chair to coordinate with the rest of the decor. Here are a few of my favorite options:
I’ll keep you posted if we decide to move forward with the project and I’ll be sure to share any developments along the way! In the meantime, here’s our running checklist of projects for the bungalow. I’m really thrilled with all of the progress we’ve made since we moved in.
Bungalow Checklist
✓ Refinish sliding barn doors
✓ Decide on a layout for the room
✓ Hang mini gallery wall
✓ Add outlet at top of stairs for window A/C unit
✓ Purchase sofa and ottoman
✓ Set up TV
Update gallery wall photos
Add a small workspace at the top of the stairs
Master Closet: Before
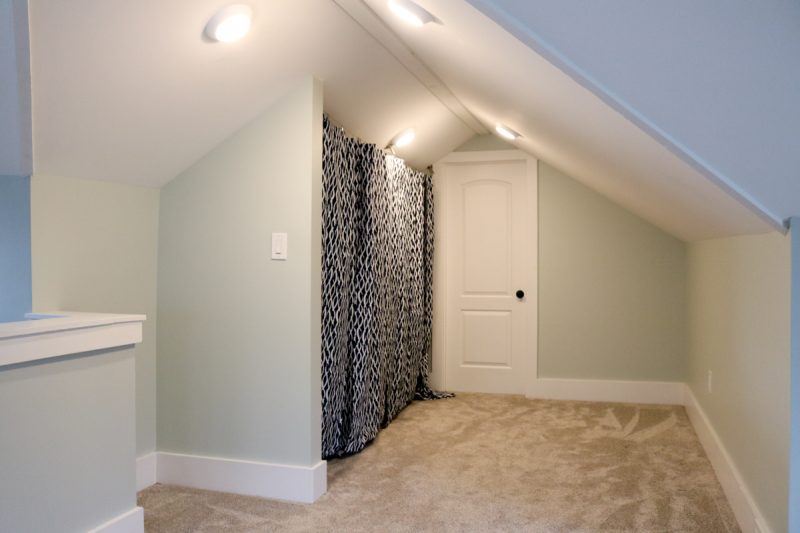
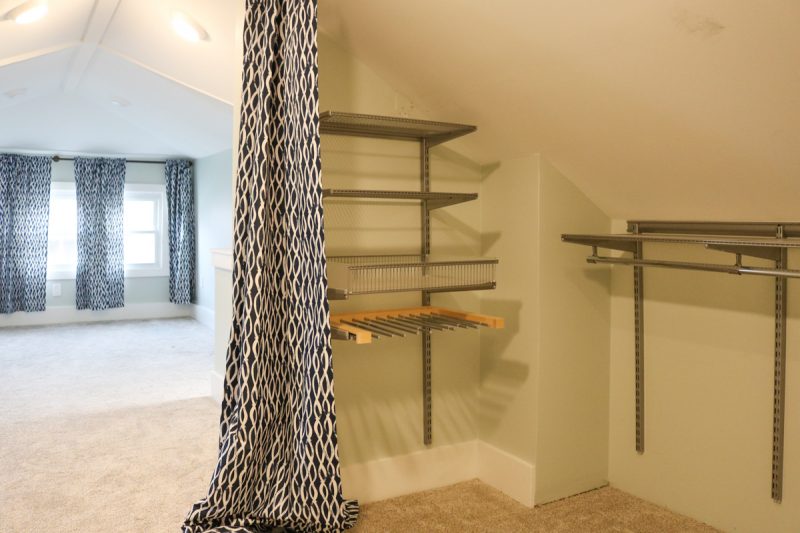
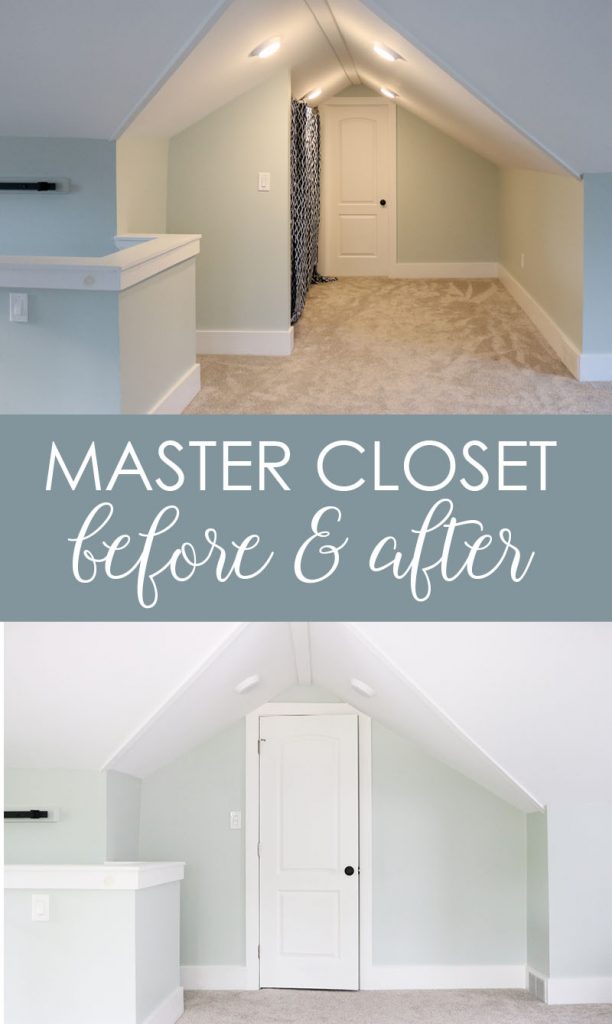
When we moved into the house, our home was in a state of frenzy for about three weeks as contractors tackled all sorts of home improvement projects. We’ve had a few substantial expenses along the way, which greatly affected our plans to buy new furniture for our home, but the project I am most thankful for was our decision to enclose the master closet. I mentioned already that the previous homeowners used the upstairs as their master suite. They even had a good size closet upstairs (which is impressive for a house this old). Their closet was nestled in the back of the bungalow and they hung curtains to conceal the area. Here is how the space looked initially. The previous owners hung their clothes behind the curtains on the left and placed their dresser in the space on the right side of the nook.
Their setup got the job done and was pretty nice, but the curtains bothered me. I knew we would be using the main part of the room for a play/living area and that we were going to utilize the closet to store our clothes. I didn’t want my clothes to be out in the open any time we had guests over to the house. It just felt a little too personal. So we hired a contractor to come take a look at the closet. I honestly believed that it would be a simple project to hang a couple of bi-fold doors over the opening and call it a day. The contractor politely explained that even though it sounded like a simple task, it wasn’t super-easy to accomplish. If we chose to add doors to the opening, they would have to be custom doors, which would be costly and he would have to build out proper framing for them – which would be complicated by the slope of the ceiling.
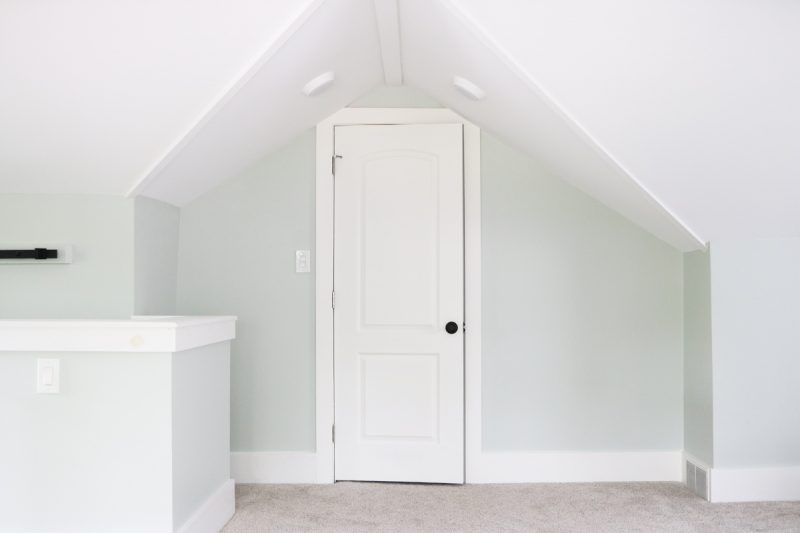
Then the contractor gave a suggestion that blew our mind. He said we should skip the bifold doors, construct a wall on the right to mirror the closet wall on the left, add a regular door and turn the space into a walk-in closet.
As exciting as a walk-in closet sounded, it took us a few days to wrap our heads around the idea. I kept going upstairs to stare at the space and consider how the finished closet might look. I was very concerned that closing off the area would make the rest of the room feel much smaller, but I knew it would be a great way to keep our clothes separate from the living space. We decided to move forward with the project and construct the walk-in closet.
Master Closet: Today
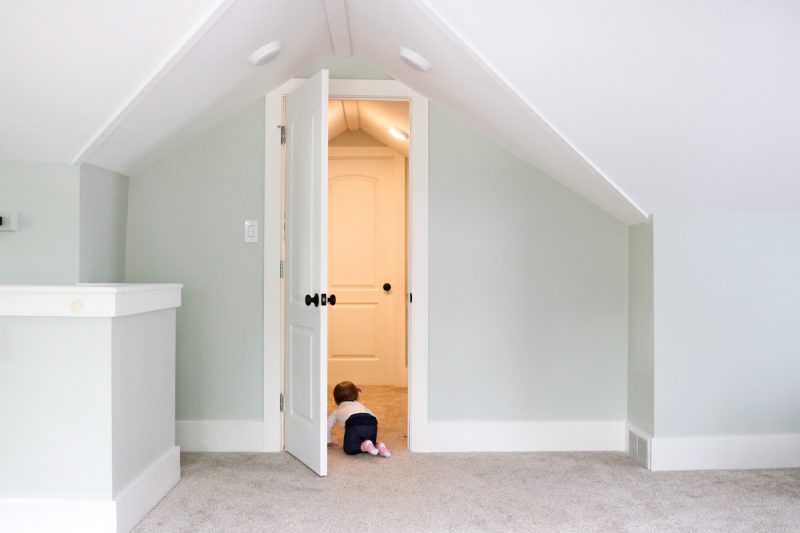
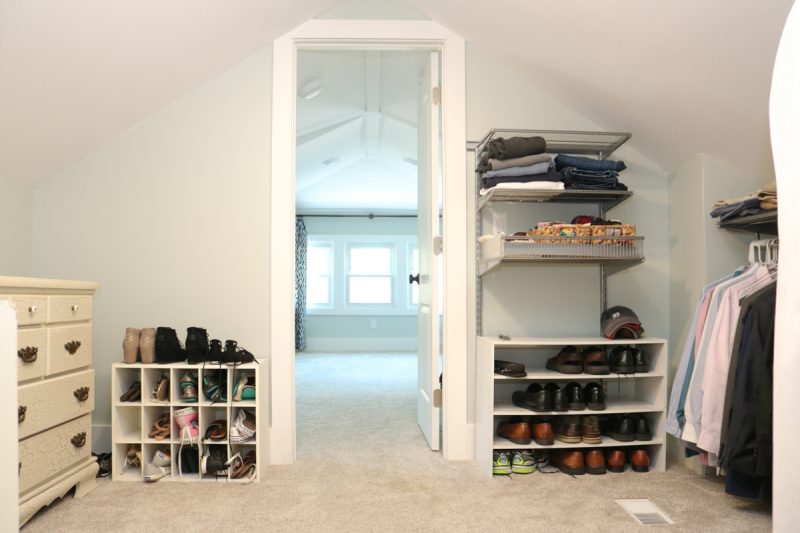
I’m sure it goes without saying that I am so incredibly glad that we chose to build the walk-in closet! The living/playroom upstairs feels so much more purposeful without a view of our clothing in the back and I love how clean the back of the room looks now. The front of the bungalow gets amazing natural light (thanks to five windows in the space) but the windowless closet area was very dark and shadowy. It felt like a cave in the back of the room. Now, we have a beautiful living area with natural light throughout and a separate, spacious closet.
Of course, things were a bit more complicated than simply building a wall and a matching door. After the wall was constructed, we hired an electrician to come out and adjust the wiring for the lights and switches inside and outside of the closet.
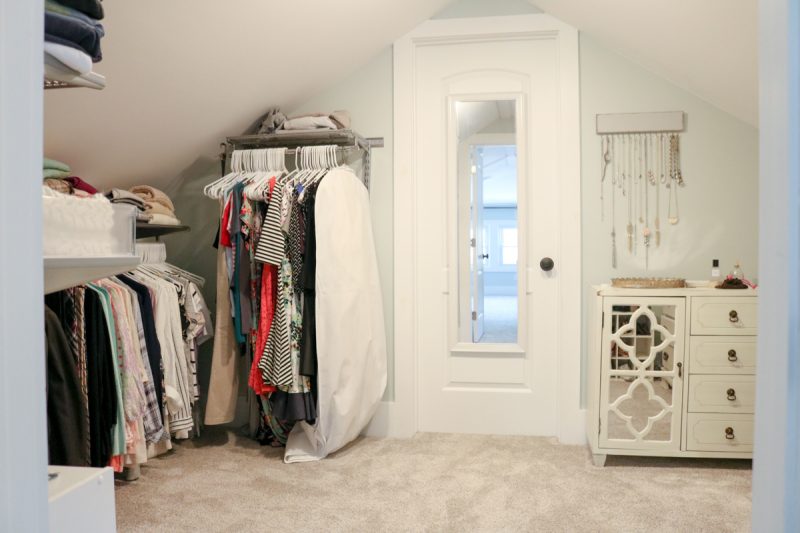
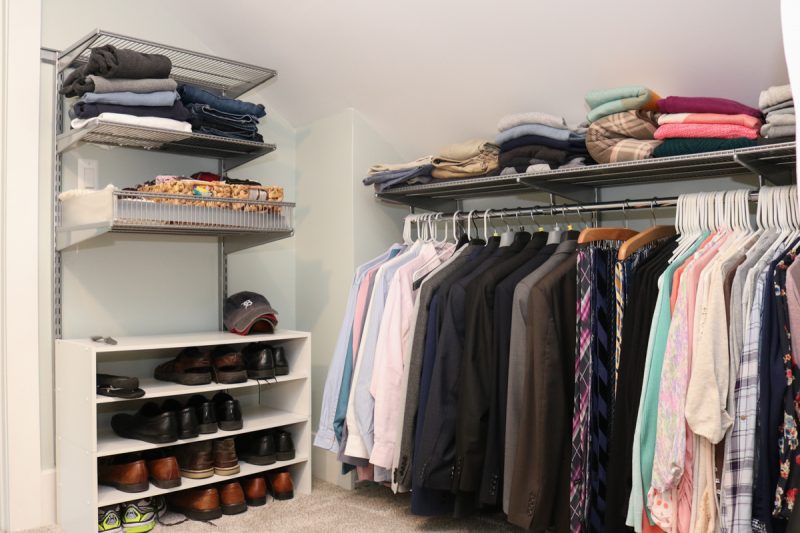
The only thing better than a spacious walk-in closet? A well-designed custom closet to make the most use of the space in an attractive way. We’ve been dreaming of a custom closet solution for this space ever since we moved into the house. Our current use of space in the closet is working very well for us now, so that item is slowly making its way to the very bottom of our home improvement list. Our current closet components may not all coordinate perfectly, but they are very functional for storing all of our clothes and shoes while we wait and dream about that custom closet.
Master Closet Checklist
✓ Take down the curtains
✓ Build a wall to enclose the space
✓ Reconfigure closet lights and add switches
Design and install custom closet
Attic: Before
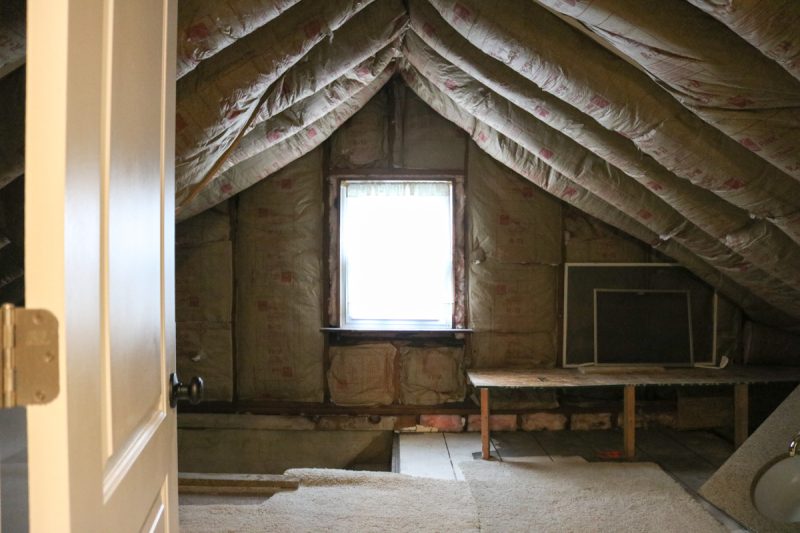
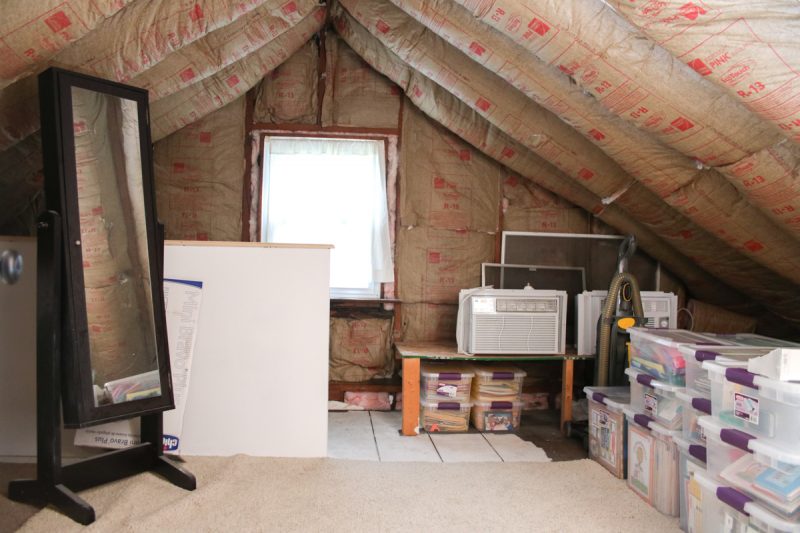
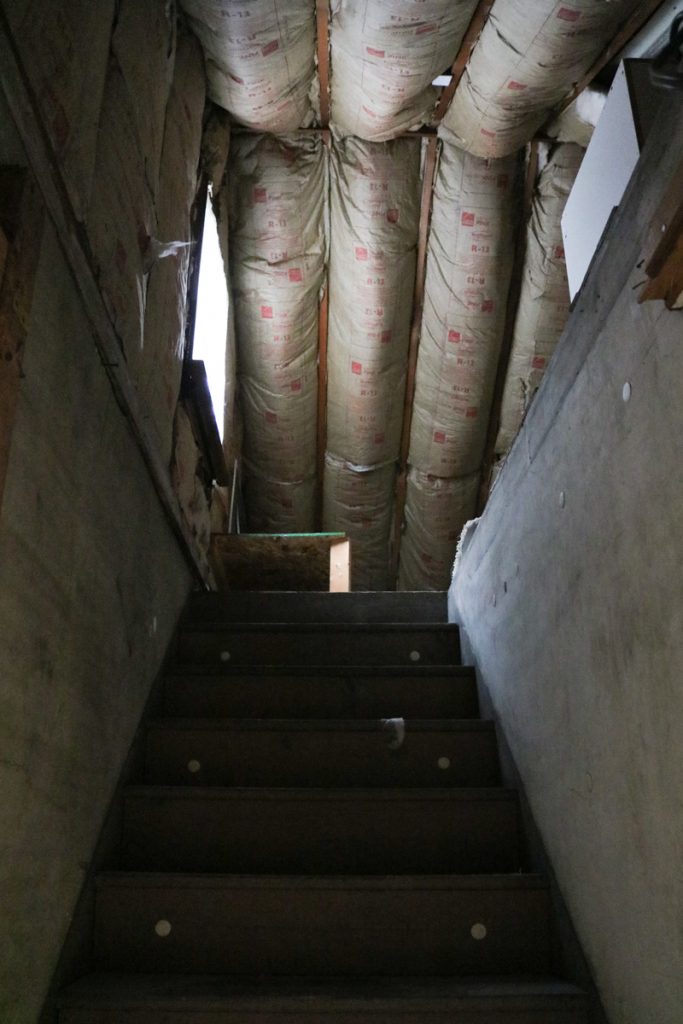
And now it’s time for the very last stop on our little home tour: the attic. This unfinished space is located behind our master closet. There truly isn’t much to see here. Just some insulation, a few carpet scraps laid on the floor and a tiny window. In the very back of the space is a staircase for the “secret passage” that leads into our bedroom.
Even though this space barely qualifies as a room, it has already received a few improvements since we moved in. Rob and I use the staircase several times a day when we want to sneak upstairs without drawing any attention from Dessa. With all of that traffic, we decided to have a half-wall built at the top of the stairs to help ward off any accidents. The attic is currently filled with all of my classroom files, books, and supplies, as well as a few household items.
While the half wall was being constructed, we decided to go ahead and paint the walls leading up the stairs. It was a simple improvement that helped to brighten the space and make it a little less creepy. You can see before and after photos below.
We’ve been thinking a lot about how we can eventually finish and use the attic as a functional area of the house one day (when the mortgage is paid off and we can save enough to pay cash for renovation). The wheels in my head have been spinning with possibilities for this room. I think the absolute most unique use of the space would be to convert it to a playroom when Dessa is older. (How fun would it be if we switched bedrooms so her room was at the bottom of the stairs and her playroom was at the top?) It could possibly become an office down the road, or a third bedroom. Another fun option would be to convert the space into a master bathroom. There are so many possibilities and it’s really fun to brainstorm and dream while we save and plan.
And there you have it – the conclusion of our updated home tour. If you can believe it, we’ve already made a few improvements to the house since we started this series of blog posts. The living room furniture has been rearranged into a more effective space and we started a design project on Havenly for a fresh set of eyes and inspiration for our living room. We also purchased the bedroom sconces I’ve been dreaming about, mounted them on each side of the bed and finally said goodbye to the giant lamp on my nightstand. Life is so good!
I’ll be sure to share another update of all our new progress with you soon. In the meantime, I’m dying to know your thoughts. What do you think about the idea of building a little workspace in the bungalow and what do you think would be a good use for the attic when we decide to finish the space?
